With gas prices continuing to rise, more and more drivers are looking to solar power as a way to reduce fuel costs and their carbon footprint. Installing flexible solar panels on your car roof provides clean, renewable energy that can be used to power your vehicle’s electrical systems and charge its battery.
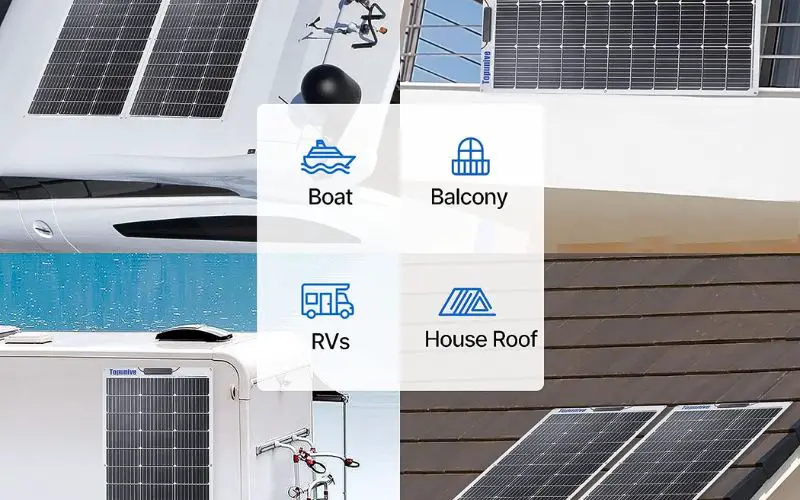
This guide will walk you through everything you need to know about choosing, installing, and caring for 100W flexible solar panels on your car, camper, or RV roof.
We’ll discuss the different types of flexible solar panels, including monocrystalline and polycrystalline silicon panels, and provide recommendations based on your vehicle’s size and roof capacity.
You’ll learn how to properly mount and securely attach solar modules to your car using adhesive tapes, sealants, and aluminum brackets. With the ability to bend and flex, these thin, lightweight panels can easily cover curved and irregular roof surfaces.
By following the steps outlined here, you can successfully collect and convert sunlight into storable energy to power your car’s electrical needs and reduce your use of gas. Get ready to harness solar energy to save money and help the environment!
Choosing the Right Flexible Solar Panel
When it comes to installing solar panels on your car, choosing the right type and size is key to maximizing energy production. There are a few main options to consider:
Monocrystalline vs. Polycrystalline Solar Panels
Monocrystalline solar panels are made from a single crystalline structure, making them more efficient at converting sunlight to energy. They tend to be more expensive but generate more power per square foot.
Polycrystalline solar panels are made from fragments of silicon crystals. They are cheaper but slightly less efficient than monocrystalline.
For small car roofs, monocrystalline is likely the better choice to produce enough power from the limited space.
Thin Film Flexible Solar Panels
Thin flexible solar panels are lightweight and easy to install over curves. They are less efficient but can be a good option for their flexibility and affordability.
Determining the Right Size
Measure the usable roof area on your car – generally 1-2 square meters. Choose a panel or panels that maximize coverage of the roof without exceeding your car’s weight limits (usually 50-100 kg).
Most 100W panels are around 40 inches long by 26 inches wide. Connecting 2-3 panels often provides enough power generation.
Preparing for Installation
Proper preparation is crucial to ensuring your solar panel installation goes smoothly. Follow these key steps:
Inspecting the Car Roof
- Thoroughly clean the roof surface, removing any dirt, debris, grease or oil that could interfere with adhesion.
- Check for dents, damage, or corrosion and repair if needed – this will allow the solar panels to mount flush.
- Inspect the interior roof lining for any perforations, leaks or issues.
Gathering Necessary Tools and Materials
- For adhesive mounting, you’ll need panel adhesive, sealant, cleaning wipes, and a plastic applicator. For bracket mounting, you’ll need panel brackets, screws, and a drill.
- Have electrical wires, connectors, conduit, and any crimping tools you’ll need for wiring.
- A multimeter to test connections, silicone sealant, and a roof rack or bars may also be useful.
Planning the Layout
- Based on roof measurements, map out panel positioning and attachment points.
- Consider the angle at which you want the panels tilted – more tilt increases winter efficiency but decreases summer efficiency.
- Plan out the wiring routes from the panels to the battery connection point.
With the roof prepped and materials ready, you’ll be set for successful flexible panel installation. Let me know if you need any clarification or have additional questions!
Installing the Solar Panel
Once you’ve prepped your car roof and gathered the necessary materials, it’s time to install the flexible solar panels. Here are the step-by-step instructions:
Mounting with Adhesive
- Thoroughly clean the roof and panel backing with alcohol wipes.
- Apply a generous amount of silicone adhesive sealant to the roof surface.
- Carefully lay the solar panel in place and apply firm pressure to maximize adhesion.
- Outline the edges with adhesive sealant to create a watertight barrier.
- Use a plastic applicator to smooth any excess sealant around the edges.
Mounting with Brackets
- Position the panel brackets along the edges of the roof at measured connection points.
- Pre-drill bracket holes into the roof, avoiding penetration through the vehicle interior.
- Secure the brackets using the provided screws, washers, and nuts.
- Carefully place the solar panel onto the mounted brackets.
- Tighten the panel securely on all brackets, but don’t overtighten.
For both methods, check that the panel lies completely flush with no raised edges or gaps. Your solar panel is now mounted! Next, we’ll discuss making the electrical connections. Let me know if you need any part of the installation process expanded on further.
Connecting the Solar Panel
Once your flexible solar panels are securely installed, it’s time to wire them up to harvest the energy. Here are the key steps:
Choosing the Components
- For an AC system, you’ll need a charge controller, inverter, and AC wiring.
- For a DC system, you’ll need a charge controller, DC-DC charger, and DC cabling.
- Ensure all components are adequately rated for your panel wattage and vehicle electrical system.
Making the Connections
- Follow the wiring diagram provided for your components. Connect the panel’s positive and negative leads to the charge controller.
- Run cables from the controller to the inverter or battery charger and check polarity.
- Connect the inverter or charger to your car’s battery to store and distribute the power.
- For AC systems, run a cable from the inverter to a car outlet.
Completing the Install
- Mount the components securely inside the vehicle, protecting them from moisture and heat.
- Seal any roof and cable penetrations with silicone sealant.
- Use grommets and cable conduits as needed to protect wires.
- Test connections and power flow before regular use.
With correct wiring and protected components, your solar panel will reliably harvest sunshine for car energy! Let me know if you need any clarification on the connection process.
Using and Maintaining the Solar Panel
Once your car solar panel system is up and running, following these tips will keep it performing optimally for years:
Regular Inspections and Cleaning
- Check for any loose connections, damaged wires, or issues with the solar panels/roof at least monthly.
- Keep the surface of the panels clean – buildup of dirt, dust, tree sap, bird droppings, etc can reduce efficiency.
- Use a soft brush and mild soap and water to clean gently if needed. Avoid harsh chemicals.
Angle Adjustment
- Adjust the tilt angle of the panels seasonally to optimize energy production as the sun’s path changes.
- More tilt in winter, less in summer. But don’t exceed roof weight ratings.
Safe Driving
- Be aware of the solar installation and take care not to dislodge panels when loading cargo on roof racks.
- Drive carefully over bumps, dips, and debris in the road to avoid damage.
Weather Protection
- Disconnect panels if the vehicle will be unused in extremely hot or cold temps for long periods.
- Avoid driving during electrical storms, hail, or high winds that could impact panels.
With regular care and maintenance, your car solar panel system can provide clean power for the long haul! Let me know if you need any clarification or have additional questions.
Conclusion
Installing flexible solar panels on your car roof is an excellent way to harness the power of the sun to reduce your fuel costs and carbon footprint. By following this guide, you now have all the key information needed to choose the right solar panels, properly mount them to your roof, connect them to your car’s electrical system, and keep them performing optimally for years.
The process does require some preparation, care, and maintenance, but the benefits of clean onboard energy production and increased self-sufficiency make it worthwhile. The technology of flexible solar panels is improving all the time as well, increasing efficiency and affordability.
As rising gas prices make drivers think more about reducing consumption and environmental impact, flexible solar panels present a viable solution. With some DIY spirit and the help of this guide, you can successfully install solar on your compact car, truck, van, or RV. Turn your daily commute into clean, green, and free miles powered by the sun!